The DOHC KA timing chains are located in front of the engine. They are wrapped around the camshafts, distributor gear and crank gears. Excessive movement of the timing chain is kept in check by the timing chain cover, timing chain guides and a tension side guide.
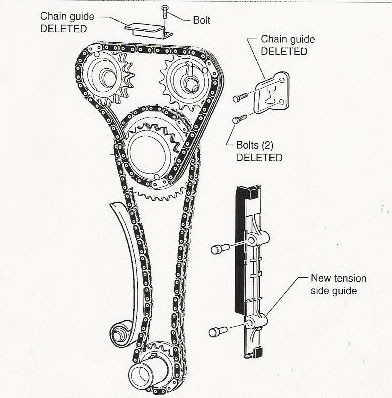
(Photo is of a Nissan Altima Timing Chain,Tension guide is located on the opposite side for the DOHC KA)
The problem with the timing chain guides is that they make a ticking sound near the front of your engine because they are smacking up against the guides. When metal smacks against metal enough, it will start wearing the metal down. As soon as it wears down, metal will break off and bits of metal getting caught in your timing chain between any of the gears behind the timing cover will cause skipping of teeth which will lead to a severely damaged engine through the form of engine detonation.
The Solution?
Remove the upper and side timing chain guides. It's easy and anyone that can follow simple instructions can do it.
For the following DIY Instructions are a combination of:
Text and Photos from ILikeMy240sx @ NicoForums
Photos from BigGameHit's Writeups @ his personal site
HOW-TO: Fix Your Timing Chain Rattle
Introduction:
There are three possible reasons why your timing chain is making the rattling noise.
1. Oil pressure is low: The tensioners that keep the timing chain tight are operated by oil pressure so if your oil pressure is low then the tensioner will not be working properly hence your chain will flap around and hit the guides.
2. Tensioner is stuck: If you have alot of oil gunk on your tensioner then the tensioner will be stuck and not extend out all the way to keep the timing chain tight.
3. Tensioner is broken: If your tensioner is mechanically broken then you need to replace it.
Having said that, before you follow this write-up it is a good idea to check your oil pressure. Also, in this write up I will not go over how to replace the tensioner but rather tell you how to clean it while it's still installed.
Difficulty: On a scale from 1~5 (5 being the hardest): 2/5
Time: Approximately 3 hours. Assuming you have no previous experience.
Tools:
-Metric Sockets including 27mm for the crank bolt
-Ratchet and wobble extensions
-Screwdriver
-Torque wrench
-Breaker bar (not necessary)
-Timing Light
-RTV Liquid Gasket
Procedures:
1. Set your #1 piston at TDC on compression stroke
-NOTE: You can tell you are at TDC on compression stroke by looking at the cams. As seen in the picture of the cams below, exhaust and intake cam lobes for #1 cylinder should be facing outward. So you might want to open the valve cover first then rotate the crank pulley. If the #1 cylinder cams are facing inwards then just rotate your pulley another 360 degrees until they are facing outwards.
-Jack up your car and crawl under your car
-Take a 27mm socket and a breaker bar and rotate the crank pulley clockwise using the crank bolt.
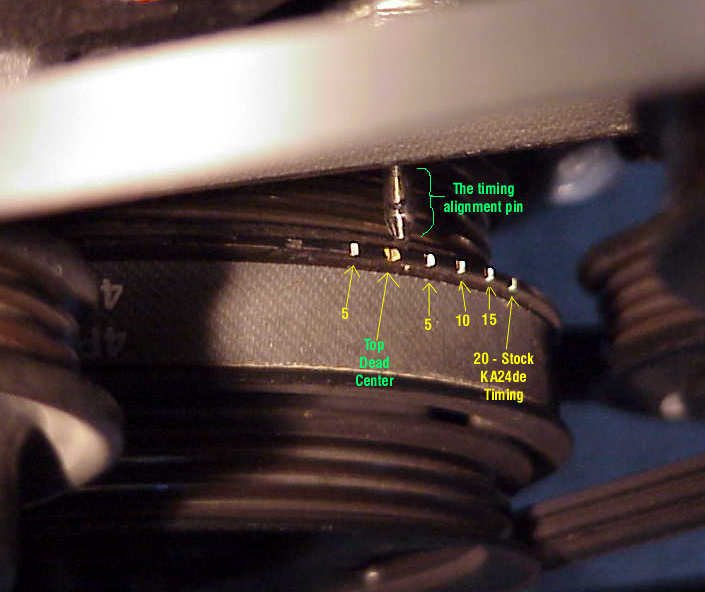
-Match the notches on the crank pulley with the needle as shown.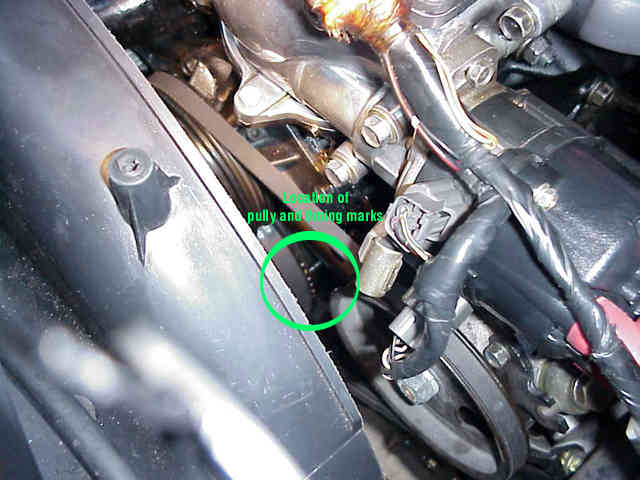
-Lower your car
2. Take off the valve cover
-Remove the spark plug wires.
-Loosen bolts as shown below.
-The bolts closest to the firewall might be a bit hard to get to because of wires and brake lines but try to push those away and wobble extension will help.
3. Remove the upper timing chain guide #1
-Note here the position of the cam lobes on #1 cylinder. They are facing outwards which means its at TDC on compression stroke. If the #1 cylinder cams are facing inwards then just rotate your pulley another 360 degrees until they are facing outwards.
-Remove the two bolts circled in yellow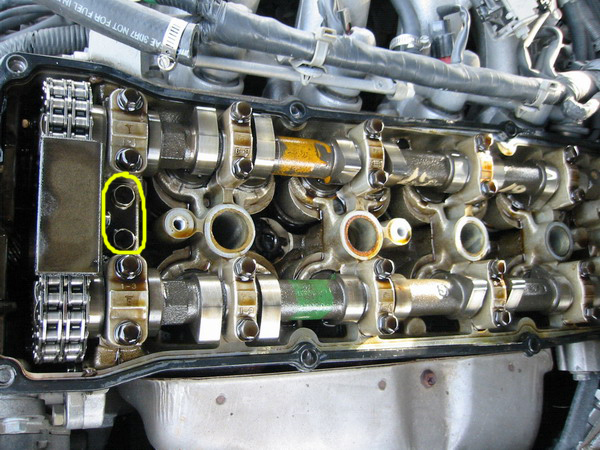
-What my guide looked like. Check out the wear.
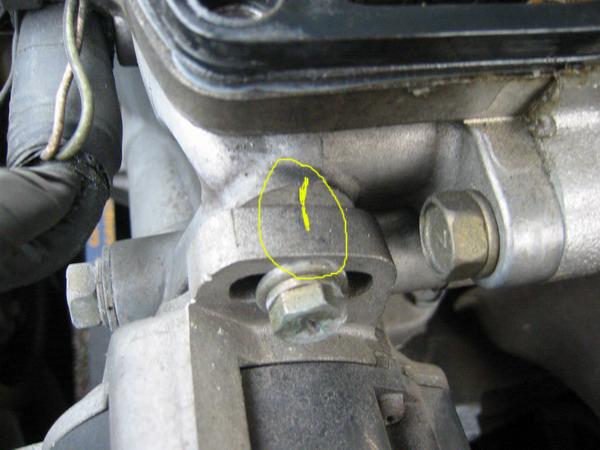
-Now before you start taking off the distributor, make a making on the mount as shown below. This will help you with installing everything back with close to correct timing.
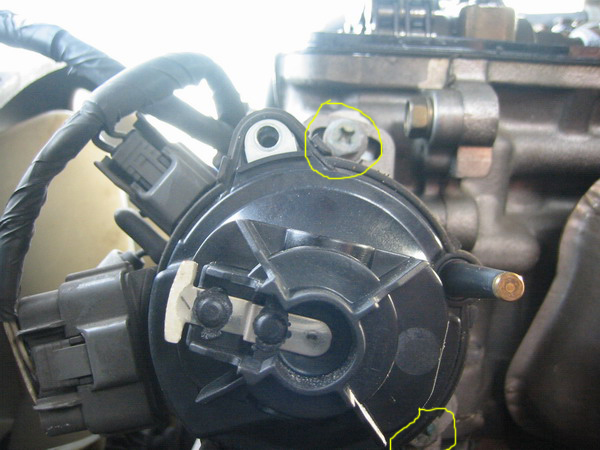
-Using a screw driver take off the cap(part that has the spark plug wires attached) off the distributor. There are two screws holding this. One on top and one on bottom. Once you take it off, you should see this. Make a marking on the rotor and the distributor so that when you install it, you know it's in correct position.
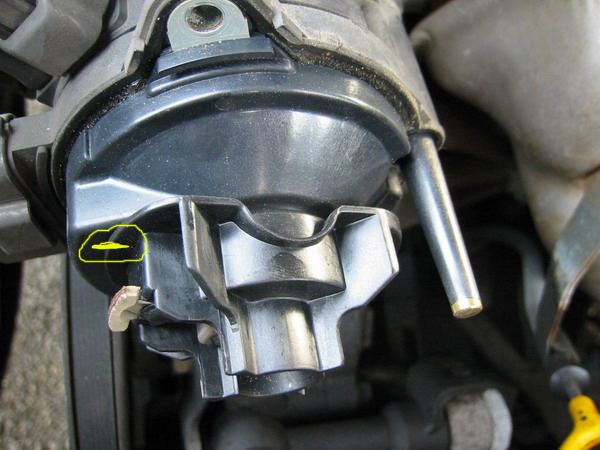
- Now, you are ready to take the distributor off. Unbolt the two bolts, circled in yellow, that are holding the distributor. One on top and one on bottom.
- Tug on the distributor with a bit of force. It should come out with a sound of "pop"
5. Take off the camshaft sprocket cover
- Here is a picture of the cover with location of the bolts and their torque specs. Please remember to distinguish between lb*in and lb*ft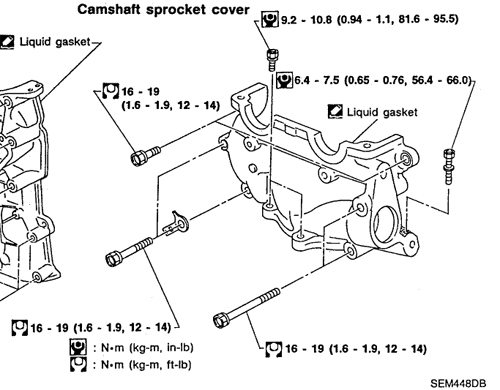
- You might have to take a rummer mallet and gently tap on cover to get it off.
6. Remove the guide #2 and clean the tensioner
- Remove the two bolts, circled in yellow, to remove the guide #2.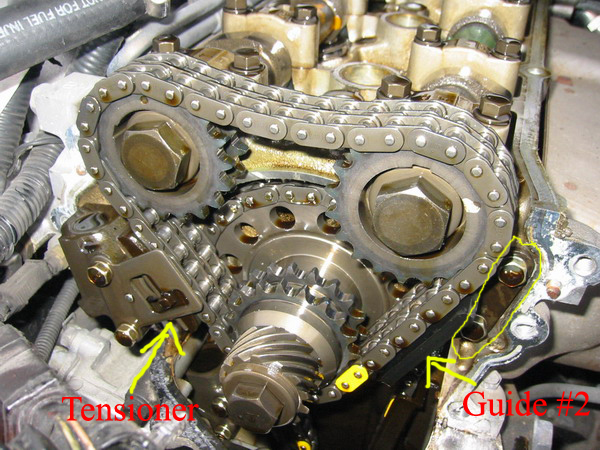
-What my guide looked like.
-Now check the condition of the tensioner. If it's really gunked up with oil then spray some WD-40 and move the tensioner in and out repeatedly (many many times) until it comes out all the way and goes in all the way freely. Here is a video of what I am talking about.
Video Link
To make sure that the tensioner is all the way out, try pushing the tensioner towards the chain.
-Check the condition of the bottom tensioner as well. It it's stuck then do the same thing as the upper tensioner. Here is a picture of the lower tensioner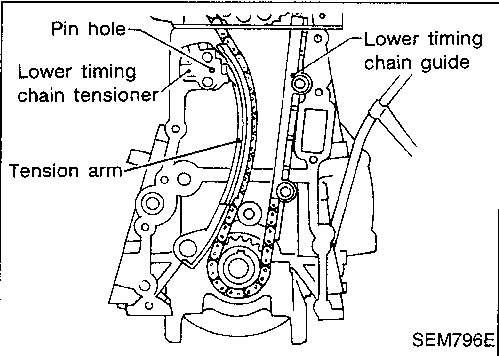
7. Install the camshaft sprocket cover
-Now your guides are gone and your tensioners are working again. It's time to install everything back together.
-Using a plastic scrapper of some sort clean the surface where the camshaft sprocket cover meets the engine. Be careful not to drop any gunk down the front cover.
-Apply your RTV liquid gasket as shown in the picture.
-Install the camshaft sprocket cover and torque to specs. Go easy on the tightening since the head is aluminium and you can easily strip the thread.
8. Install your valve cover
- Put your gasket in the valve cover as shown in the picture.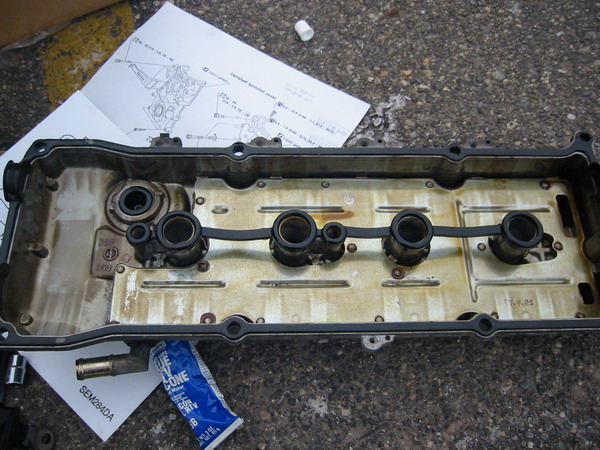
-Apply RTV sealant at the semi-cricle "ditch" in front of the camshaft and also in the back as shown in the picture.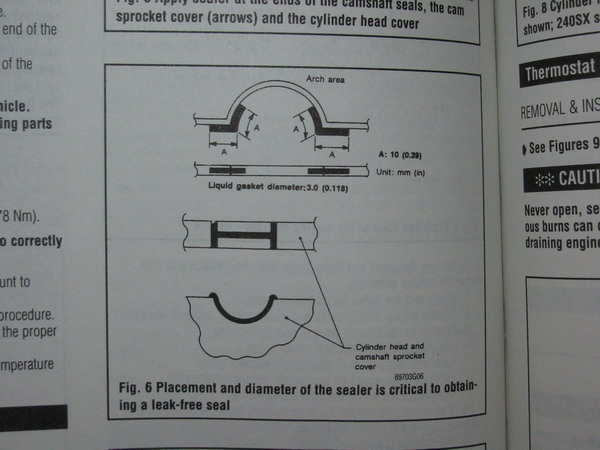
-Install your valve cover and tighten as shown below. Torque spec is around 7~10 lb*ft
9. Install Distributor.
-Now this is the tricky part...
-If your car is S13, your distributor should look like this when #1 piston is at TDC on compression stroke.
-If your car is S14, you should align the distributor as shown below and it should look like this installed.
-If you made the mark on the rotor before, this would be a simple process assuming your engine did not move.
-Also, your rotor should be perfectly aligned with #1 spark plug wire as shown below.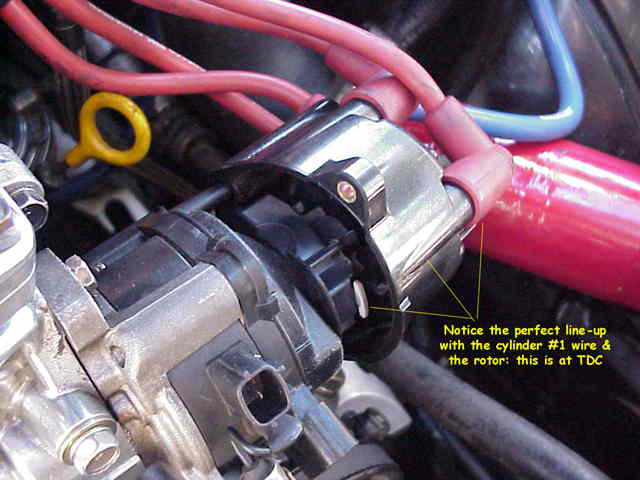
-Rotate your distributor so that it matches the marking you made on the mounts previously. This should bring you close to the timing you had before.
-Please note the spark plug wire position and install them back.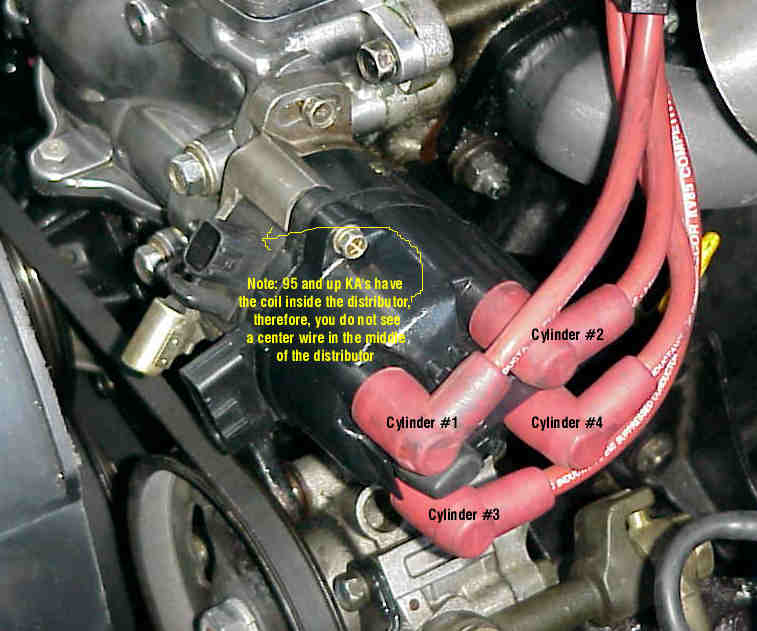
-Make sure everything is connected and good to go. Start your car and check your timing. If its not in spec, disconnect your throttle position sensor and adjust your idle so that is around 700 +-50 and check your timing. If its out of spec, make sure you installed your distributor correctly and rotate your distributor accordingly to retard or advance timing.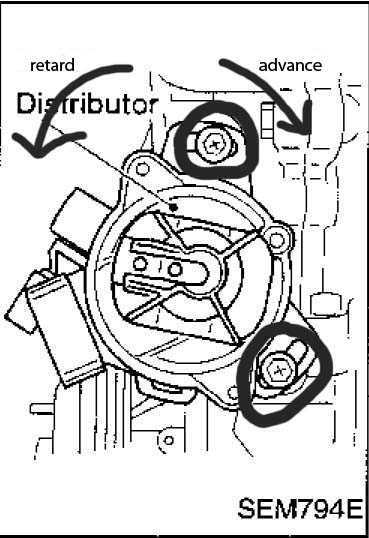
Pat your self on the back and grab a bottle of beer. You are finally done with the infamous timing chain guide noise.
-Mainichi Tuning
No comments:
Post a Comment